创建WordPress 的 Settings Pages ,用Piklist很容易的添加任意的表单控件。首先,我们要先注册一个Settings Pages,然后再添加Settings Sections(表单控件)。Piklist使用WordPress标准的Settings API,扩展了功能和使它更容易使用。你可以查看《Piklist中文手册》中的表单控件,那里介绍了能使用的表单控件和Tab标签选项。
下面实例,我们将创建Settings Pages包含Select,text 和 colorPicker控件:
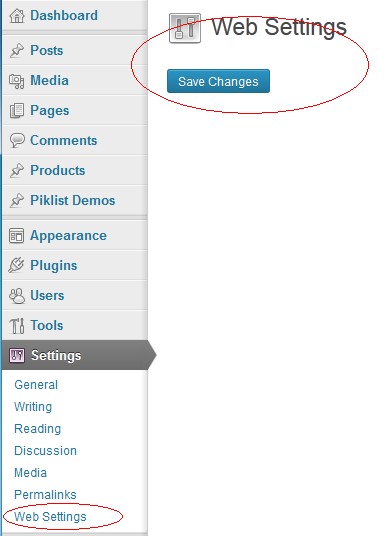
注册你的Settings Page
在Piklist的hook事件函数里,很多时候我们都是用一个简单的数组定义参数。如果你的Settings Pages在主题里写在functions.php。如果在插件里就写在主php文件里,勾住piklist_admin_pages
add_filter('piklist_admin_pages', 'piklist_setting_pages');
function piklist_setting_pages($pages)
{
    $pages[] = array(
     'page_title'  => 'Web Settings'          // 菜单标题
    ,'menu_title' => 'Web Settings'           // 菜单连接标题
    ,'sub_menu'   => 'options-general.php'    // 显示哪个菜单,如:themes.php不填就是顶级菜单
    ,'capability' => 'manage_options'         // 能看到这个页的权限
    ,'menu_slug'  => 'piklist-setting-fields' // 菜单 slug
    ,'setting'    => 'piklist-setting'        // settings 名称 关联的控件php文件用到
    ,'icon'       => 'options-general'        // 图标
    ,'save'       => true                     // true = 显示保存按钮 / false = 隐藏保存按钮
    ,'default_tab' => 'Basic'                 //设置标签选项页
    );

    return $pages;
}
创建Settings Section
1.我们先在主题或者插件Piklist的parts目录下新建一个settings目录
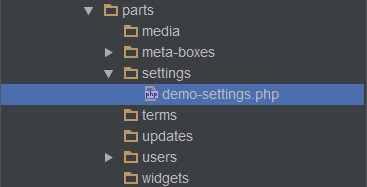
2.所有相关的settings的php文件都放在该目录下,然后我们新建一个demo-settings.php文件,并写上至少两个注释属性的文件结构参数
<?php
/*
Title: Web Settings Section
Setting: piklist-setting
*/
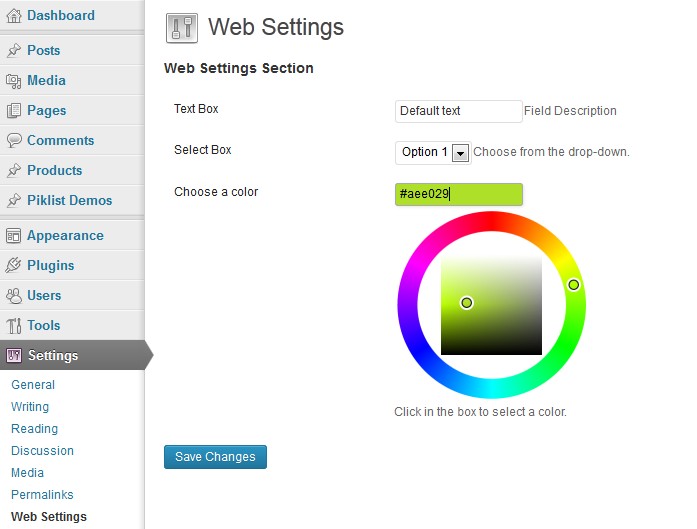
上面settings的两个注释参数告诉我们的settings名为”Web Settings Section” 并且setting参数对应我们前面定义的Settings Pages,而实际应用中可能会使用其他注释参数,请查阅《Piklist中文手册》中的Settings文件结构。
下面我们创建第一个表单控件 text 控件
piklist('field', array(
    'type' => 'text'
,'field' => 'text'
,'label' => 'Text Box'
,'description' => 'Field Description'
,'value' => 'Default text'
,'attributes' => array(
        'class' => 'text'
    )
));
WordPress Settings API创建一个text box用了一个简单的数组定义。参数type=>text 就是Piklist渲染出的控件,注意,这非常类似创建一个meta-boxes要区别分清楚。
接下来再创建一个Select控件
piklist('field', array(
    'type' => 'select'
    ,'field' => 'select'
    ,'label' => 'Select Box'
    ,'description' => 'Choose from the drop-down.'
    ,'attributes' => array(
      'class' => 'text'
    )
    ,'choices' => array(
      'option1' => 'Option 1'
      ,'option2' => 'Option 2'
      ,'option3' => 'Option 3'
    )
  ));
注意这里和上面创建text控件有两处不同:
- type=>select
- choices 是一个数组定义选择项目
最后我们再添加一个colorPicker 控件 type=>colorpicker
piklist('field', array(
    'type' => 'colorpicker'
    ,'field' => 'colorpicker'
    ,'label' => 'Choose a color'
    ,'value' => '#aee029'
    ,'description' => 'Click in the box to select a color.'
    ,'attributes' => array(
      'class' => 'text'
    )
  ));
最终预览效果:
deom-settings.php全部代码:
<?php
/*
Title: Web Settings Section
Setting: piklist-setting
*/

piklist('field', array(
    'type' => 'text'
,'field' => 'text'
,'label' => 'Text Box'
,'description' => 'Field Description'
,'value' => 'Default text'
,'attributes' => array(
        'class' => 'text'
    )
));

piklist('field', array(
    'type' => 'select'
,'field' => 'select'
,'label' => 'Select Box'
,'description' => 'Choose from the drop-down.'
,'attributes' => array(
        'class' => 'text'
    )
,'choices' => array(
        'option1' => 'Option 1'
    ,'option2' => 'Option 2'
    ,'option3' => 'Option 3'
    )
));

piklist('field', array(
    'type' => 'colorpicker'
,'field' => 'colorpicker'
,'label' => 'Choose a color'
,'value' => '#aee029'
,'description' => 'Click in the box to select a color.'
,'attributes' => array(
        'class' => 'text'
    )
));
在主题上输出这些控件值:(记得先在Settings Pages页上先保存一下数据)
我们只需要在主题需要的地方用WordPress的 get_option函数取值并echo输出就可以了。
<?php
$setting_options = get_option('piklist-setting');

$text_field = $setting_options['text'];
$select_field = $setting_options['select'];
$colorpicker_field = $setting_options['colorpicker'];

echo 'text field: ' . $text_field .'<br />';
echo 'select field: ' . $select_field .'<br />';
echo 'colorpicker field: ' . $colorpicker_field;
刷新你的浏览器:
text field: Default text
select field: option1
colorpicker field: #aee029
好详细啊……